Showing posts with label Projects. Show all posts

Sunday, November 17, 2013

The Office: Colors Galore

Hey guys,

After deciding on a layout and determining our aesthetic, it's now time for color! This is the part that I was very excited about for a few reasons.

  1. I'm inspired by designers who use colors, patterns and textures in such tactful ways.
  2. The current color scheme of our house is very neutral — a lot of grays and a bluish gray color... I think it's time for a change.
  3. Using colors pushes me outside of my comfort zone, so I want to challenge myself to use color.
As I was thinking about the office, I knew that every color palette I selected need to to incorporate non-neutral colors. I used Kelly Moore's Color Studio to select a set of colors for three different color palettes. Many paint companies have similar design tools as Kelly Moore. I decided to use Kelly Moore because it's pretty easy to use.

Here's what I put together...

OPTION #1: AUTUMN ACCENT
In this palette, I used neutral color combinations for the walls and tried to bring in brighter pops of color. In general, the palette is very muted, but definitely incorporates colors that I wouldn't normally use.

None of these colors are ones that I would actually, use except for the neutrals (the gray and the charcoal).
But I think they look nice together.

OPTION #2: FOGGY BOTTOM
This palette is very neutral with a small pop of color. Foggy Bottom probably fits better with the themes in the rest of our house.

Pretty much all neutral colors with the purple as the main "pop"

OPTION #3: CITRUS FRUIT
This palette, while full of neutrals, has very bold and strong colors that will make anyone's head turn. It naturally is a more eclectic selection.

Very bright accents...challenge accepted!

In the end, we decided to be bold and step completely out of our comfort zone. We went with Citrus Fruit!

I am super excited to have a bright orange wall and can't wait to piece everything together!

Up next we will take a look at various design concepts in order to hone in on a final concept.


Stay tuned!

{Rashida}

Saturday, October 19, 2013

The Office: What's Your Aesthetic?

Residential interior designers often say that they have to be marriage therapists too. Husbands and wives tend to get at each others' throats when selecting furniture, materials, paint, etc. for something so personal as their own house. Luckily, Ben and I are not the combative type, but I didn't realize how different our aesthetics were until now.

This next phase in our office design, and for any Flashbent Interiors project, is to understand our client's aesthetic. After all, not everyone can live in an boudoir inspired bedroom with black lace...


...but it works for Christina Aguilera.

So how does one figure out their aesthetic?

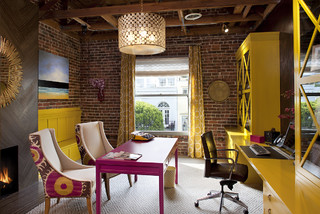
One great resource is Houzz. It's like Pinterest for interiors. Browse through the many pictures of interiors to get a sense of what resonates with you, what you like, and what you hate. As the designer for our office, I created an IdeaBook with a bunch of images of home offices that I LOVED, liked, and I thought were OK. I didn't select any that I hated since I am also the client :)

I absolutely LOVE this office space. It's unique, bright, modern, and eye-catching.
Contemporary Home Office by San Francisco Interior Designers & Decorators Artistic Designs for Living, Tineke Triggs


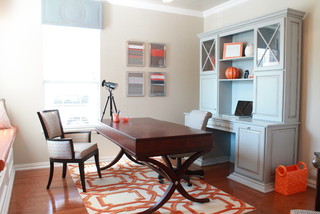
I like this. It's a subtle mix of color.


This is not bad. It's a little more traditional or formal than I would like, but I wouldn't protest if this were our office.


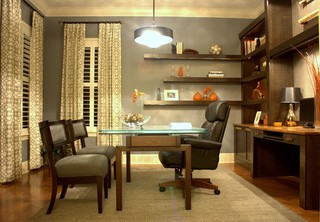
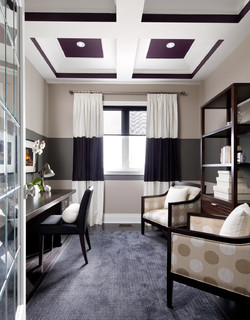
Of the 30 home office images that I selected, Ben liked only a few. None were on my LOVE list, but were doable. And marriage is all about compromise. I learned that Ben's aesthetic is slightly contemporary, but highly functional. He wouldn't want anything just because it's "pretty"; it has to be useful.

This was one of his favorites. He really likes the stripes on the wall and likes the clean lines. He doesn't like the main office chair though.


This was probably on the extreme of what Ben liked, but he said he liked the color and that it looks functional.


Given his choices and my choices, we are agreeing that a contemporary style is the way to go. The main colors should be subtle and more neutral looking (for Ben), but there can be some pops of color for my eclectic taste.

I love it when we both can have our way. :)

SIDENOTE // many people think they are a certain aesthetic when they really are not. The nice thing about Houzz is that I can put together an Ideabook with many different styles and tastes to find out what actually suits my clients best.

Next step is selecting our color palette.

Stay tuned!

{Rashida}


Wednesday, July 24, 2013

The Office: Laying out an Oddly Shaped Room

Our Office project is going to be a Furnishing Project. Based on the need-finding we explained in the Setting the Stage post, we only need a furniture solution rather than a structural solution, which would be a Restructure Project. The first part of a Flashbent Furnishing Project is working with the client to choose a layout for the space. Since it's our own project, we are our own clients!

As I mentioned in the previous post, the room we're transforming is very awkwardly shaped. There are lots of doors, the room slants, and there is a built-in window bench. Due to this difficult configuration of space, we decided to mock up a few different layouts in AutoCAD to ensure that real furniture could actually fit in the space. Typically rough sketches would suffice for allowing the client to see the layout opportunities for their space, but precision was key in this case. The layouts had to have:
  • a desk (preferably two)
  • chairs (preferably two)
  • a sleeper couch 
So here we go!

Layout A: This is a basic arrangement, utilizing the right wall for my desk and the couch. The desk is a little too small for the type of school & business work I anticipate doing in the future.


Layout B: This layout features the main desk near the closet, providing a location for a printer, while also being close to the Ethernet port near the main door. The smaller desk in the corner can be used for my computer work, but again is too small for any layout or drafting work.


Layout C: This layout utilizes the right wall for the full desk space, leaving the window seat open as an alternate seating space to the couch. However, it's a tight squeeze between the desk and the wall to the bathroom.


Layout D: In this layout, there are two different sized desks that are arranged more towards the center of the room. It seems a little tight.


Layout E: This last layout places the desks around the edges, leaving access to the window bench. Also like Layout B, having the main desk near the closet is ideal.


Given the need for large desk space for me and the proximity of the main desk to the closet, we decided to go with Layout E.

Up next is the exciting part, determining the style, where we choose the aesthetic for the room.  Do we want Modern? Traditional? Eclectic? Glam? Check back for the next post to find out!

{Rashida}

Monday, July 15, 2013

The Office: Setting the Stage


While our first real project for Flashbent is underway, we also have a little project of our own: converting a bedroom into our home office. We currently have an office, but it's really only a place where my hubby works, plus the space is small and the furniture is too big.

The goal of this project is to:
  • Provide a space in which I can do my school work (so I am not doing it on my favorite place... the kitchen table)
  • Create a space that is ready to meet with potential clients
  • Provide a space for Ben to still do work, as this would be his new office as well
We are treating ourselves like one of our own clients so we can solidify our process, deliverables, and time frame. To use the tech industry's term, we will be "eating our own dog food."

This space is going to have to accomplish a lot:
  • It needs to provide computer space and potentially layout space for me and my projects
  • It needs to be a space for Ben to work with multiple monitors
  • It needs to double as a guest room
  • It will also need to serve as a "man cave" of sorts
Given the room's awkward small shape, we have an added challenge of furnishing the room without completely blocking windows, doors, and pathways.

Small bedroom with barely any wall space and a lot of doors.

In the next post, I'll talk about the different layouts I created to meet our goals and design challenges.

Stay tuned,

{Rashida}

Tuesday, February 5, 2013

The Master Bathroom Project | Recap + Reveal (Part 8)

At last!

It is with great pleasure that I announce that this is the absolute last post on our Master Bathroom Remodel Project! After 3 weeks of experimenting with new products, learning new skills, and having a messy and unusable bathroom, our master bath remodel is finally complete!

Our Master Bathroom is complete!

Here's the journey of our bathroom transformation:
  1. We first mocked up our bathroom in Google SketchUp so that we could start toying around with potential designs for our new bathroom.
  2. We selected which design we liked the best and the next step was to remove the existing mirror from the wall (without breaking it or creating a massive hole in the wall).
  3. Using Rustoleum's Cabinet Refinishing kit, we refinished our cabinets to a color called Kona. It was quite a tedious process, but I imagine that it was easier than sanding, and it was a huge transformation to the room.
  4. We decided to do the electrical next, while we gave our cabinets time to cure for a bit. Jason from Oak Electric came in and wired new lighting, new electrical outlets, and a new switch.
  5. The second biggest transformation was painting the walls in a black and gray.
  6. Once the paint dried, we moved on to creating two framed mirrors. This was, by far, the most tedious and most experimental part of the entire process, but we got through it...eventually.
  7. Finally, we finished up with some minor finishing touches.

Here are all the "Before, SketchUp Design, and Afters" so you can see the complete transformation in different angles.

Master Bathroom Bird's Eye View

Master Bathroom Entry (Ground)

Master Bathroom Sink & Vanity

Master Bathroom Tub Area

Master Bathroom Entry (Mid-Level)

Our total cost for the project was around $440. (We probably paid somewhere around $350 since we had many of the painting supplies already).

Overall, it was a good experience and we learned a lot along the way — e.g. never build your own mirror frame :).

We have to figure out what our next home renovation project is going to be. When we do, you'll be the first to see the progress! In the meantime, I am going to enjoy my new clean bathroom.

Cheers,

{Rashida}

Friday, January 18, 2013

The Master Bathroom Project | Finishing Touches (Part 7)

I'm back! I know it's been a while... I had final projects, presentations, and tests for school so I was in focus mode. And now that's over and done with, I can finish up blogging about my Master Bathroom Remodel project!

This is the second-to-last installment in my Master Bathroom Remodel project. To remind you all of what has happened so far, check out my previous posts:

This post is just about the finishing touches. We built a small shelf, purchased a wall scone for additional task lighting, and purchased two decorative candle sconces for the back wall. This completes our original design and adds a little bit of interest to the bathroom itself.


PART 1- Building the Shelf

SUPPLIES:
  • One 6" x 4" wood plank
  • Paint (same paint/stain from the Cabinet Refinish Project)
  • Two L-Brackets (you want to buy one that is as long as your shelf protrudes from the wall for support)
  • Wall Screws
  • Edgemate White Melamine Roll
  • Drill
DIY STEPS
Time frame:3 hours

1. Iron on the Melamine around the edge of the shelf.
This provides a smooth edge and eliminates the need to sand the edges. Simply line the edges and use and iron to adhere it to the surface.
Iron on White Melamine Strip
2. Paint.
Paint all surfaces of the shelf. The paint should adhere fairly well to the Melamine and to the wood itself.
Painted Block of Wood
3. Measure and mark where you want your shelf to sit.

4. Drill holes for the screws.
Based on your measurements, mark where the L-brackets will sit against the wall and on the shelf. Pre-drill the holes into the shelf and the wall for the L-brackets.

Note: If you are screwing into a stud, there is no need to pre-drill. When using a wall anchor in place of a stud, pre-drill.

5. Attach L-bracket to shelf according to measurements in step 3.
Make sure to use short screws (1/2") so your screws do not appear on the top surface

Note: We didn't buy appropriately long brackets. We bought these little guys... which obviously did not support the weight of anything on the shelf, let alone the shelf itself. So we had to build our own "L-bracket" out of left over pieces of wood. Save yourself some time and buy one that actually fits your shelf!
Our makeshift shelf support with the small L braces used to attach it to the wall.

6. Attach the bracket/shelf unit to wall.
For this step, use the longer screws that will actually fully penetrate the drywall.

Drilling in an extra screw for support at the end of the shelf.


PART 2- Attaching the Sconce Light
This was part of the reason for the pre-wiring in Part 4 of this blog series. Again, thank you Oak Electric!

SUPPLIES:
  • A wall sconce of your choice
  • Drill
DIY STEPS
Time frame: 10 minutes

Follow the instructions in the box. Each lighting assembly will be different. Be sure to purchase the correct bulb before leaving the store!


The sconce is up and running!


PART 3-  Decorative candle sconces

SUPPLIES:
  • Decorative candle sconces of your choice
  • Drill
DIY STEPS
Time frame: 10 minutes

1. On the wall, mark where you want your sconces to sit.
It may be helpful to have someone hold the sconce to the wall, while you step back to take a look. Mark the spot where the screw would go into the wall.

2. Drill the hole (if necessary) and attach the sconces.


PART 4-  Touch Up
Touch up the paint on any places that seem to need it.
After the sconce light was installed, we realized the mirror frame needed some touch ups.

We never painted our makeshift bracket. So that needed some paint too.

TOTAL COST: $48

OVERALL IMPRESSION
Our bathroom looks more complete with those extra touches. New towels and other little trinkets, such as posters/photos, candles, vases, are great ways to jazz up the bathroom. 

We are finally finished!
The official "clean up" photo.
The last post will have before and after shots to see the scope of the full remodel from beginning to end.

Stay tuned!

{Rashida}

Monday, November 19, 2012

The Master Bathroom Project | Adding Framed Mirrors (Part 6)


Ok.

This is blog post #6 about the Master Bathroom Remodel. I went from the easiest part (painting) to the hardest part (creating our own framed mirrors with backlit LEDs). If you need to catch up on what we've done so far, check out my previous posts:
Instead of the long mirror going across the entire vanity, we wanted to replace it with two smaller framed mirrors centered over each sink basin. In addition, I had the bright idea of back-lighting the mirror with LED lights. (I drew my inspiration from the back-lighting in this Kichler lighting video.)


Preview of the final result

Pretty cool idea eh? Well I thought so too until we had to start putting it together. We could have easily just bought a framed mirror... or even a pre-built frame itself! But, no... we decided to build everything from scratch and things were a little more complicated than expected.

In the end, we were happy with the finished product, but I'll at least suggest buying a framed mirror to minimize your frustrations. :)


Would you like to join in on the framing, mirror, and LED fun? Here's how we did it, so you can DIY:

PART 1 - Building the Framed Mirror

SUPPLIES:
DIY STEPS
Time frame: 1 day

1. Cut the MDF casing 2 inches longer than the dimensions of the mirror.
The mirror was 24" x 30" in our case, so we cut two pieces that were 26" and two pieces that were 32" for one mirror. We cut the MDF casing 2 inches longer so that was a 1-inch clearance around all sides of the frame.  This allowed us to have space to adhere the LED lights to the wood. To cut the 45 degree angles, we used a miter box and hand saw.


Measured the MDF
Cut the MDF using a Miter Box and Saw. It's a fantastic tool.
Note: Make sure that when you are cutting, you are paying attention to which edges you are cutting from. The thicker ends of the MDF casing should have more length than the shorter ends because it will be on the outside of the frame. We weren't  paying attention and cut it incorrectly. We didn't have enough extra wood to cut an entirely new piece, so we had to fix it by gluing some pieces together.

Our mistake. So we had to glue two pieces together and paint over the seam...ugh

2. Paint all sides (even the back!) of the casing.
It's important to paint all sides of the casing because the mirror will reflect whatever color is on the inside. (Again, we didn't do that, so we had to make some adjustments...you'll see what I mean later.)

You will see that we painted these before we cut them. That was a mistake.
Plus we only painted one side of them. Another mistake.
3. Let it dry and do a second coat, if needed.


4. Piece and staple the frames together.
Layout the frame, face down. Staple the backs together with the staple gun.

My handy dany staple gun. (Notice that the backs are not painted. They should be.)

5. Attach the mirror to the frame.
The mirror came with mounting clips typically used to screw into the walls. If you just reverse them and screw them into the wooden frame, you can easily mount it. You may need to buy shorter screws though (hence the 1/2" wood screws on the supply list).


These little clips were meant to hold mirror to the wall.

Well, we didn't find these clips until we were attaching the mount to the mirror (Part 3 of this entire ordeal). So we tried to glue the mirror on instead. The guy at Home Depot recommended some all-purpose, extra strong glue to us... it did not work! We glued the frame to the mirror multiple times and it still wasn't sticking. If only we had found the mirror clips sooner!

Our attempts at gluing the mirror failed miserably. Every time we thought the glue was dry, it wasn't.  Even after we clamped it and weighed it down with the heaviest things we could find in our garage, we still had not luck.

This process seems simple right? It is, but we had a lot of trial and error with glue and other aspects. Once the frame is done, you are now ready to attach the LED lights.


PART 2 - Attaching the LED lights

SUPPLIES:

DIY STEPS
Time frame: 1-2 hours

1. Orient the framed mirror.
Figure out the location and orientation of each mirror. It is important to determine which part of the mirror is closest to the outlet. Therefore, you can lay down the LED rope light with the plug oriented closest to the outlet.

2. Attach LED lights.
Attach the LED lights with either a glue adhesive (LiquidNails) or mounting clips. Depending on taste and preference, you can use the mounting clips that are supplied with the rope lights. The mounting clips raise the LED lights off of the mirror a quarter of an inch, which will be visible when mounted on the wall. The glue will also hold the mirror in place, but you are going to run out of hands to hold the LED rope in place while the glue dries. Note: Do not try to use any other glue! Liquid Nails is the best.

At this point, we hadn't bought the liquid nail adhesive so we were using hot glue, the home-depot-"recommended"-glue that failed, the staple gun and tape. Not the best use of resources or time. 


Hot Glue!

Staple Gun!

Tape! All failed. 


The LED rope lights came with mounting clips, which we didn't find until after we had finished this process. This was the second time that we didn't dump out all of the materials in a package.  Fool me once; shame on you. Fool me twice; shame on me. I learned my lesson! Next time I vow to dump out everything in the box before I start putting things together.


PART 3 - MOUNTING THE MIRROR

SUPPLIES:
  • LiquidNails adhesive
  • Clamps
  • Four 8" 2x4 wood blocks
  • Two 16" x 20" particle boards
  • 1" x 2" x 32" furring strip
  • 2.5" wood screws
  • drywall anchors
DIY STEPS
Time frame: 1-1.5 days

1. Figure out how much clearance you need for the LED light plug.
Weirdly, the LED plug was like 3 inches long. This meant that the mirror needed to be at least 2.25" off of the wall because the recessed outlet went in .75". So we had to build a mount that pushed the framed mirror off the wall at least 3 inches. We designed a mounting mechanism on paper and a process of assembly to best adhere the mirror to the wall.

The plan and the measurements.

It took a lot of time to figure out the best method. We were actually going to nix the entire LED light idea because the technical skills required seemed to be beyond our capabilities, but we decided to push through it.


2. Cut your wood pieces.
We measured out the dimensions of each of the materials (indicated above), clamped it to a stable horizontal surface, and cut away! We also sanded off the excess frayed edges.

Measuring the particle board to be 16" x 20".

Power tools. Yessss! There will be 2 of these boards.

Cutting the 2x4s to 8" pieces. There should be 4 of them.

Using the reciprocating saw to cut the furring strip into two 16" pieces.

Sanded off the excess frays.

I was pretty excited. I got to use my rotating and reciprocating saws for the first time!


3. Mount furring strip along the top of the particle board.
Line the skinny side of the furring strip with LiquidNails. For more stability, also drill three (approximately) evenly spaced holes to screw the particle board onto the furring strip. Drill and screw in from the particle board side, not the furring strip side.

Glue the furring strip onto the particle board.

Clamp them together.

Flip the boards over from the orientation in the picture above. Drill pilot holes and insert screws through the particle board into the furring strips.
Finished mirror mount. Well, one part of it.


4. Measure the location of your particle board on the backside of your mirror.
Through a lot measurements, we found the best location for the particle board mount so that we were maximizing the usage of the stud locations. Once we had those measurements down, we traced the particle board onto the back of the mirror using a permanent marker. Make sure it is level!

We had to do a lot of measuring in this project...

5. Glue on the particle board to the mirror.
LiquidNails is your best friend. Squeeze that stuff within the boundaries of the outline you just created on the mirror. Attach the board with the furring strip pointing up. Let this dry for 16 hours!

Once it's dry, it's not going anywhere.

Tip: Find something heavy to put on top of it. This will distribute the glue and ensure that the mount sticks to the mirror back.

6. While the glue is drying, measure the mount location on your wall.
Take accurate measurements of everything! How far away is the mount from edge of the mirror? How far away is the mirror from the wall? How high is the mirror above the wall? Write it all down and begin to pinpoint the locations on your bathroom wall.

7. Attach 2x4s to the wall with the screws.
We used 4 screws per 2x4. Where the 2x4 is not directly over a stud, pre-drill holes and insert drywall anchors. Make sure they are level with each other, otherwise be prepared for a lopsided mirror.

We put in dry wall anchors where the blocks were not going into studs.
Drill at least 4 holes in each block for the screws. 

Make sure they both are level. We used that thin piece of wood shown so we could determine the levelness since we didn't have one of those big levelers

About 16 hours after you've glued the particle board to the mirror back...

8. Slide the mirror onto mounted 2x4s.
This is the last step! Place the mirror onto both of the 2x4s and (as best as you can) nail the furring strip onto the 2x4s. This will secure the mirror to the wall. We tried to put at least 2 nails in each 2x4.

Hammering it in was a bit difficult. There wasn't not a lot of clearance to hold the nail up and hammer at the same time. But we eventually did it.

Plug in the LED rope light and you are ready to go!!


Shot with main lighting

Shot without main lighting.


TOTAL COST: $155


OVERALL IMPRESSION
The project turned out to be a little pricier than anticipated. If we ever do this again, we'll have to do some better research on LED backlighting. I think I would also shop around for better LED lights. These lights were too warm in color and kind of finicky to stick on. If we had just built the frame and the mirror (and had the right glue and dumped out all the materials from the get-go) this project may have been a little more manageable.

Also since we didn't paint the inside of the frame beforehand, we had to figure out how to hide the ugliness. We had some rope handy, so we spray painted it and hot-glued it onto the frame. Quick and easy fix, but obviously not ideal.
"The Ugliness"... you can see the inside wood color through the mirror's reflection. This is why it is important to paint all sides of the frame.

Rope.

Spray painting the rope.

Hot gluing the rope to the mirror.

Ugliness gone! Trimming the frays

You live, you learn...

Finally! It's done!


At last, we are getting to the final touches — putting up the sconces and shelf!

The light is near! Now it's time to get some rest...

{Rashida}